Managing blood sugar is one of the most important parts of living with diabetes — and doing it correctly at home can make a real difference to your health. Whether you have been newly diagnosed or have been testing for years, knowing exactly how to check blood sugar at home the right way ensures you get accurate readings, avoid painful mistakes, and stay in control of your condition. In this complete guide, you will find everything you need: how your meter works, a step-by-step testing walkthrough, how to read your results, and when to contact your doctor.
What Is a Blood Glucose Meter and How Does It Work?
A blood glucose meter — also called a glucometer or blood glucose monitor — is a small, handheld device that measures the amount of glucose (sugar) in a tiny drop of your blood. It works by analyzing the electrical signal produced when your blood reacts with a chemical called glucose oxidase on the test strip. Within seconds, the meter converts that reaction into a digital number displayed on its screen.
Modern meters are compact, affordable, and easy to use. Most require a blood sample smaller than a grain of rice. They are accurate enough for everyday home monitoring, though they are not as precise as laboratory tests used by your doctor. That said, when used correctly, home meters fall within the internationally accepted accuracy range of plus or minus 15 percent of a lab reading, which is more than adequate for daily management decisions.
There are also continuous glucose monitors (CGMs) — wearable sensors that track blood sugar every few minutes throughout the day and night without finger pricks. CGMs are increasingly popular, but traditional meters remain the most widely used and affordable option for home testing.
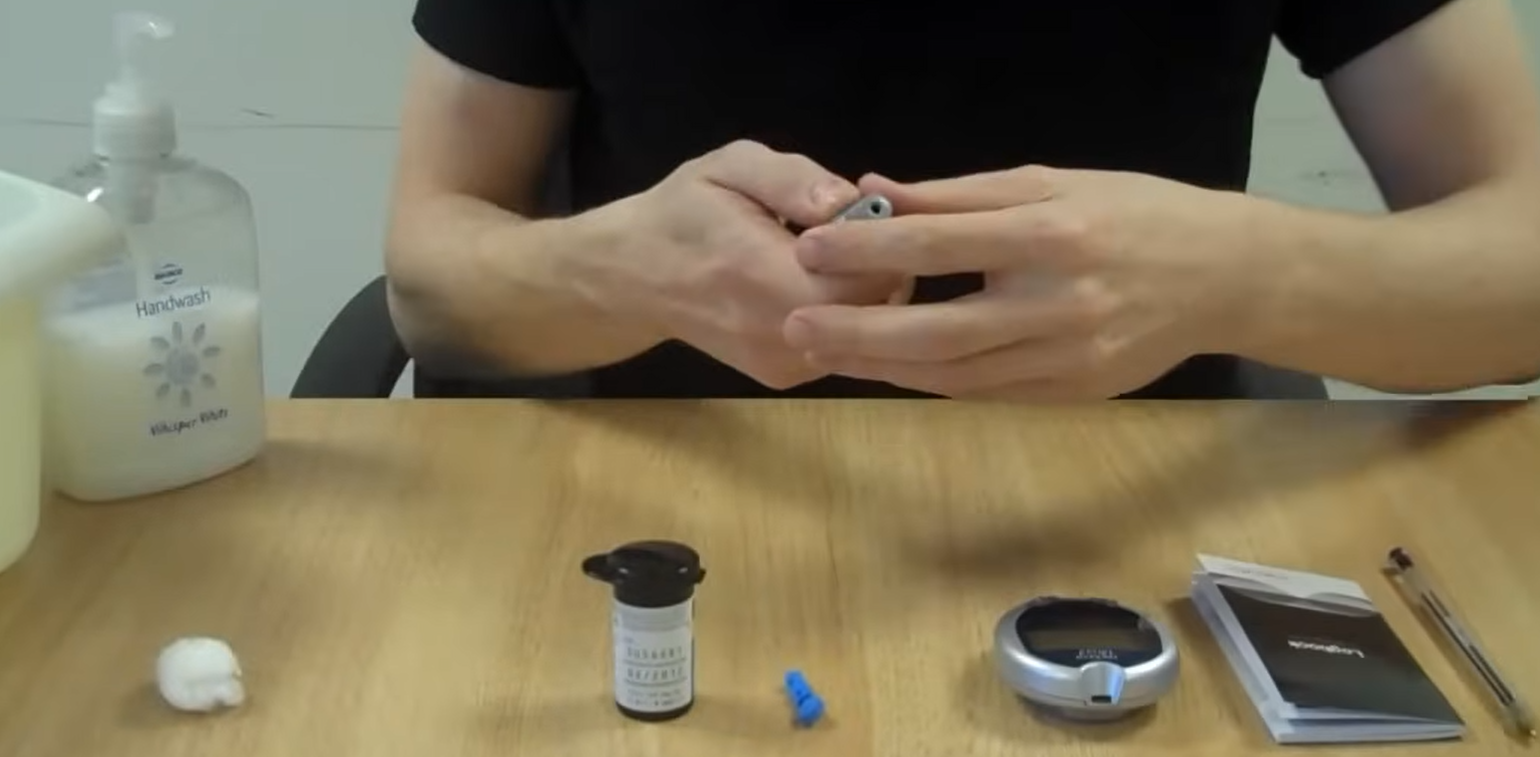
What You Need Before Testing Your Blood Sugar at Home
Before you begin, gather everything you need and lay it out on a clean, flat surface. Having all your supplies ready prevents fumbling mid-test and reduces the risk of contamination or errors.
Here is your complete testing kit checklist:
- Blood glucose meter (charged or with fresh batteries)
- Test strips (check the expiry date — expired strips give inaccurate readings)
- Lancet device (also called a lancing device or finger pricker)
- Lancets — the small, sterile needles that fit inside the lancet device
- Alcohol wipes or soap and water
- Cotton balls or clean tissue
- A blood sugar logbook or a diabetes management app on your phone
- A sharps disposal container for used lancets
A quick note on test strips: always use strips that are compatible with your specific meter brand. Mixing brands is one of the most common causes of inaccurate readings. Store your strips in their original sealed container, away from heat, humidity, and direct sunlight — a bathroom cabinet is not ideal because of steam from showers.
How to Set Up Your Blood Glucose Meter
If you are using a new meter for the first time, proper setup is essential. Even experienced users should run through these checks periodically to make sure their device is performing correctly.
Insert a test strip: Open your test strip container and remove one strip, handling it by the edges only. Insert it into the meter’s designated slot. Most modern meters power on automatically when a strip is inserted.
Check the code: Some older meters require you to enter a code number that matches your strip batch. This calibrates the meter to that particular lot of strips. Many newer models are “no-code” and skip this step automatically.
Run a control solution test: At least once when you open a new box of strips, apply a drop of control solution (not blood) to a strip. The meter should display a result within the target range printed on the strip container. If it does not, the meter or strips may be faulty.
Set the date and time: Make sure your meter’s clock is accurate so that logged results are timestamped correctly — this matters when reviewing patterns with your healthcare team.
Step-by-Step: How to Check Blood Sugar at Home
This is the core of the process. Follow each step carefully. Skipping even one step — like skipping the hand wash — can shift your result by as much as 50 mg/dL, which could lead to incorrect treatment decisions.
Step 1: Wash and Dry Your Hands
Wash your hands thoroughly with warm water and plain soap for at least 20 seconds. Rinse well and dry completely with a clean towel. This is the single most important step. Residue from food — even something as subtle as fruit juice on your fingers — can dramatically skew your result upward. If soap and water are not available, an alcohol wipe is acceptable, but wait for it to dry completely before pricking, because any remaining alcohol will sting and can affect the reading.
Step 2: Insert a Test Strip into the Meter
Remove a single test strip from the container and close the lid immediately to protect the remaining strips from moisture and air. Gently insert the strip into the meter’s slot until it clicks into place. The meter should display a blood drop symbol or another indicator showing it is ready to receive a sample. Do not touch the chemical reaction zone at the tip of the strip.
Step 3: Prick Your Fingertip with the Lancet
Load a fresh lancet into your lancing device and set the depth dial. A lower number means a shallower prick — most people find depth 2 or 3 comfortable. Press the device firmly against the side of your fingertip (not the center pad, which has more nerve endings and is more painful) and release the trigger.
Rotate which finger you use and which side of each finger you prick. Using the same spot repeatedly causes calluses and makes future testing harder. If a large enough drop does not form, do not squeeze hard — instead, lower your hand below your heart for a few seconds and then gently milk the finger from the base toward the tip.
Step 4: Apply the Blood Drop to the Strip
Touch the very edge of the test strip’s absorbent tip to the blood drop — do not smear or press. The strip draws the blood in by capillary action automatically. Most meters beep or show a progress bar once enough blood has been absorbed. If the sample is insufficient, the meter will show an error code and you will need to repeat with a new strip.
Step 5: Read and Record Your Result
Your result appears on the screen within 5 to 10 seconds. Write it down immediately in your logbook along with the date, time, and context (for example, “fasting”, “2 hours after dinner”, or “before exercise”). If your meter syncs to an app, confirm the reading transferred correctly. Dispose of the used lancet safely in a sharps container — never recap or place it in general household waste.
How to Read Your Blood Sugar Results
A number on its own means little without context. Here is a general reference for blood glucose targets in adults, according to guidelines from the American Diabetes Association (ADA). Your doctor may set personal targets that differ from these, so always follow their specific guidance.
| When Tested | Normal (No Diabetes) | Target for Type 1 & 2 Diabetes | Concern Range |
|---|---|---|---|
| Fasting (before breakfast) | 70 – 99 mg/dL | 80 – 130 mg/dL | Below 70 or Above 180 |
| 2 Hours After a Meal | Below 140 mg/dL | Below 180 mg/dL | Above 250 mg/dL |
| Before Bed | 100 – 120 mg/dL | 90 – 150 mg/dL | Below 90 or Above 200 |
| Before Exercise | 90 – 250 mg/dL | 90 – 250 mg/dL | Below 90 or Above 300 |
Numbers are reported in milligrams per deciliter (mg/dL) in the United States. In many other countries, including the UK, Australia, and Canada, glucose is measured in millimoles per liter (mmol/L). To convert, divide the mg/dL value by 18. For example, 126 mg/dL equals 7.0 mmol/L.
Your HbA1c test, done in a lab every 3 months, gives a longer-term picture of blood sugar control — it reflects your average glucose over roughly 90 days. Home readings feed directly into this picture, so consistency in tracking matters.
Common Mistakes to Avoid When Testing Blood Sugar at Home
Even people who have been testing for years slip into habits that compromise accuracy. Here are the most common pitfalls and how to avoid them:
Using expired test strips: Always check the expiry date on the vial. Expired strips give false readings — typically lower than actual — which could lead you to skip insulin when you actually need it.
Skipping the hand wash: As mentioned earlier, food residue is the most common cause of falsely high readings. Washing hands is non-negotiable.
Squeezing the finger too hard: Forceful squeezing dilutes the blood sample with interstitial fluid, which lowers the glucose concentration artificially and gives a falsely low reading.
Leaving the strip container open: Humidity degrades the enzyme coating on strips. Close the cap tightly immediately after removing a strip.
Testing with cold hands: Cold fingers have poor circulation. Warm your hands under running warm water or rub them together briskly before testing.
Reusing lancets: A lancet becomes dull after a single use, making subsequent pricks more painful and increasing infection risk. Always use a fresh lancet.
How Often Should You Test Your Blood Sugar at Home?
Testing frequency depends on your type of diabetes, your treatment plan, and what your healthcare provider recommends. There is no universal answer, but here are the general guidelines:
Type 1 diabetes: Typically 4 to 10 times per day — before each meal, 2 hours after meals, before bedtime, before and after exercise, and whenever symptoms of low or high blood sugar arise. People using insulin pumps or CGMs may test less frequently with finger pricks.
Type 2 diabetes (on insulin): Usually 2 to 4 times daily, though this varies. Your doctor will prescribe a specific testing schedule tied to your insulin doses.
Type 2 diabetes (not on insulin): Testing may be less frequent — perhaps once daily, or a few times per week — but structured testing around meals can provide valuable information about how food affects your glucose.
Gestational diabetes: Typically 4 times daily — fasting in the morning and 1 to 2 hours after each main meal.
Always follow the schedule your doctor prescribes. If your glucose is consistently within range, your provider may reduce how often you need to test. If you are adjusting medications or experiencing unusual readings, more frequent testing is wise.
When to Call Your Doctor About Your Blood Sugar Readings
Home monitoring is a tool to support — not replace — your medical care. Certain results demand prompt medical attention:
- Blood sugar above 300 mg/dL (16.7 mmol/L) that does not come down after corrective action
- Blood sugar below 70 mg/dL (3.9 mmol/L) that does not respond to 15 grams of fast-acting carbohydrate within 15 minutes
- Repeated high or low readings over several days with no clear explanation
- Symptoms of diabetic ketoacidosis (DKA): extreme thirst, frequent urination, nausea, fruity-smelling breath, or confusion
- Symptoms of a hypoglycemic emergency: severe shakiness, confusion, loss of consciousness, or seizure — call emergency services immediately
Do not wait for your next scheduled appointment if you see persistent patterns outside your target range. Your healthcare team can adjust your medications, review your technique, or recommend a specialist referral.
Tips for Tracking and Managing Your Blood Sugar at Home
Accurate testing is only half the equation — what you do with the data matters just as much. Here are practical strategies for turning raw numbers into better health outcomes:
Keep a detailed logbook: Note every reading alongside the time, what you ate, your activity level, stress, illness, and any medications taken. Patterns become visible over days and weeks that a single number never reveals.
Use a diabetes management app: Apps like mySugr, Dario, and OneTouch Reveal sync with many meters and generate graphs automatically. Some can also share reports with your doctor.
Understand your personal patterns: Look at your readings at the same time of day across a week. Is your fasting glucose creeping up? Does a particular meal spike you consistently? These patterns guide smart lifestyle and medication adjustments.
Bring your meter to appointments: Your doctor or nurse can download your meter’s memory, review the last 90 days of readings, and compare them with your HbA1c. This conversation is often more useful than the lab result alone.
Store supplies properly: Keep your meter and strips at room temperature, away from extreme heat or cold. If you travel frequently, insulated cases are available for diabetic supplies.
Frequently Asked Questions
What is a normal blood sugar level at home?
For adults without diabetes, a fasting blood sugar (taken after at least 8 hours without food) is considered normal between 70 and 99 mg/dL. Two hours after eating, a normal reading is below 140 mg/dL. For people with diabetes, your doctor will set personalized target ranges that may differ from these general guidelines — always defer to their specific advice.
How do I check my blood sugar without a meter?
The most practical alternative to a traditional finger-prick meter is a continuous glucose monitor (CGM), such as the FreeStyle Libre or Dexterity G7. These wearable sensors are applied to the upper arm or abdomen and measure interstitial glucose every few minutes. However, no reliable method exists for checking blood sugar completely non-invasively at home without any device — be cautious of unregulated apps or gadgets claiming to do so.
Can I check blood sugar from my arm instead of my finger?
Yes — this is called alternate site testing (AST). Many meters support readings from the forearm, palm, or thigh. However, glucose levels at alternate sites can lag behind fingertip readings by 20 to 30 minutes, especially during rapid changes in blood sugar (such as after a meal or exercise). For the most time-sensitive decisions — like dosing insulin or treating a low — always use a fingertip reading.
How accurate are home blood glucose meters?
Under FDA and international ISO standards, cleared blood glucose meters must be within 15 percent of a lab result at least 95 percent of the time. In practice, most current-generation meters perform even better than this. Factors that reduce accuracy include expired strips, improper storage, extreme temperatures, anemia, certain medications, and poor testing technique. Running a monthly control solution test helps confirm your meter is performing correctly.
What time of day is best to check blood sugar?
There is no single best time — different readings give different information. A fasting reading (first thing in the morning before eating or drinking anything except water) reveals your baseline overnight glucose and helps assess insulin resistance. Post-meal readings (1 to 2 hours after eating) show how your body responds to food. Pre-bedtime readings help ensure overnight safety. Your doctor will advise which times are most relevant for your specific situation.
How do I lower my blood sugar quickly at home?
If your reading is high but you are not experiencing emergency symptoms, light physical activity such as a 10 to 15 minute walk can help lower glucose in people whose bodies still produce some insulin. Drinking water and avoiding further carbohydrate intake for a couple of hours may also help. If you take insulin or other glucose-lowering medications, follow your doctor’s correction protocol. Never attempt to treat a dangerously high reading at home without medical guidance, and always seek emergency care if you feel extremely unwell.
How do I know if my blood glucose meter is accurate?
The most reliable way is to use the control solution that came with your meter. Apply a drop to a test strip and check that the result falls within the target range printed on the strip container. You can also compare your home reading to a blood draw taken at the same time at a lab or doctor’s office — the two results should be within 15 percent of each other. Replace your meter if the control solution test consistently fails or if your meter has been dropped, submerged, or exposed to extreme conditions.
Final Word
Checking your blood sugar at home is one of the most empowering things you can do for your health. It gives you real-time feedback about how food, activity, stress, and medication interact with your body — information that no doctor’s visit alone can provide. With the right technique, good supplies, and consistent habits, your home readings become a powerful tool that supports better decisions every day. When in doubt, bring your meter and your logbook to your next appointment and let your healthcare team help you make sense of the data. You are not managing this alone.
Sources: American Diabetes Association (ADA), FDA Blood Glucose Monitoring Guidelines, CDC Diabetes Management Resources, NHS Diabetes Overview.